
In my previous post about the Steam Deck we discussed some of the privacy and security concerns that the device presents, and we looked at the controls it has to help mitigate some of those risks. Notably, I also complained about the lack of easy encryption options accessible from the Steam Deck UI. So in this post, we're going to look at one way in which you can encrypt sensitive data on the steam deck filesystem using Plasma Vaults, a feature built into the Plasma desktop environment used by SteamOS. Though, as you'll see in this post, there is some required setup to get them working.
So what are KDE Plasma Vaults?
KDE Plasma Encrypted Folders is a feature offered by the KDE Plasma desktop environment, a popular open-source graphical user interface used in Linux-based operating systems. These folders allow you to encrypt files and directories on your computer, providing an additional layer of security to protect sensitive information from unauthorized access.
Why would you want to encrypt data on your Steam Deck in the first place?
The Steam Deck is a portable device that is effectively a portable personal computer. It runs Linux as its base operating system and as such is capable of running a wide range of applications. For starters, it contains data related to logging into your steam account. If you leverage a web browser such as Chrome, then the Steam Deck will have sensitive files such as your history, cookies, and even stored passwords. It's a good practice to keep sensitive data encrypted on any computing device, and the Steam Deck is no exception to this rule. Unfortunately, as mentioned previously, the Steam Deck does not have a convenient way to encrypt the contents of the storage disk from within the Steam Deck UI. This is where KDE Plasma Vaults come in.
So how do we set up Plasma Vaults on the Steam Deck?
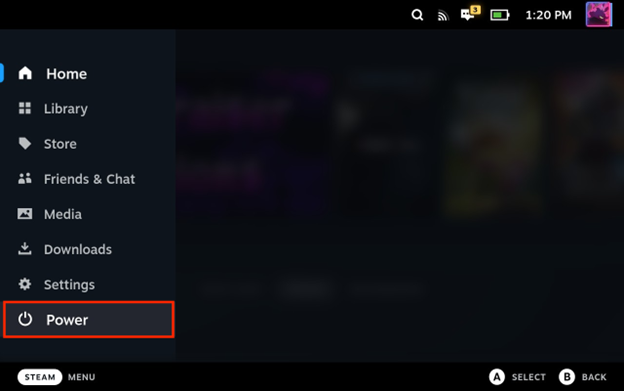
First, you'll need to go into the Desktop Mode of the Steam Deck. To do this, simply open the power menu by pressing the STEAM button and selecting "Power" from the menu.
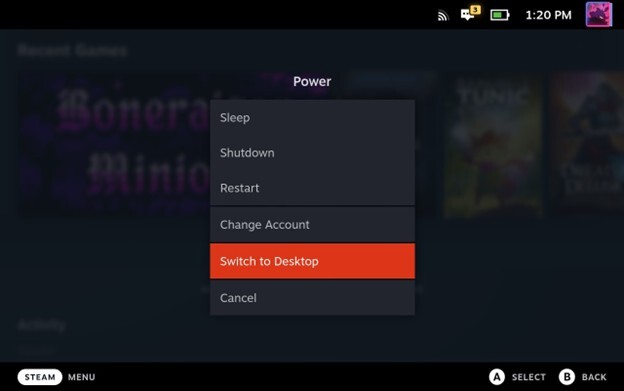
And then select "Switch to Desktop".
Once in Desktop Mode, if you haven't already done so, you will need to set up a password for the deck user. Open up an instance of the Konsole terminal application and run the passwd command.
Input a password for the user when prompted for one. The following screenshot shows an example of this (note: you will not see any characters in the prompt as you type in the password). Make sure you store this password in a password manager for safekeeping, as it's difficult to change if you forget it.

Now that we have set up a password for the deck user, we can use sudo to run commands with root-level privileges on the Steam Deck. We're going to need this because the SteamOS base image doesn't package any of the encryption backends that Plasma Vaults use. To fix this, we will need to install one of the following backends: CryFS, EncFS, or gocryptfs.
For this post we'll use the gocryptfs backend. We can run the following commands in a terminal on the Steam Deck to install the backend.
    sudo pacman --cachedir /tmp -Sw --noconfirm gocryptfs
mkdir -p ~/.local/bin

    tar -xf /tmp/gocryptfs-*.pkg.tar.zst -C ~/.local/bin --strip-components=2 usr/bin
sudo rm -f /tmp/gocryptfs*.pkg.*
mkdir -p ~/.config/environment.d
echo 'PATH="$PATH:$HOME/.local/bin"' >> ~/.config/environment.d/envvars.conf
echo 'export PATH="$PATH:$HOME/.local/bin"' >> ~/.bash_profile
Using the previous commands, we install the gocryptfs package to a temporary directory, and then unpack it into the ~/.local/bin directory and then we place the ~/.local/bin directory into the deck user's PATH. We do this because anytime there is a SteamOS system update, several directories on the file system are wiped and reset to a default state. Due to this, it is a hassle to install packages from the Arch AUR using pacman. However, everything under the /home directory is untouched by system updates. By moving the gocryptfs package into ~/.local/bin, we can persist it across SteamOS system updates.
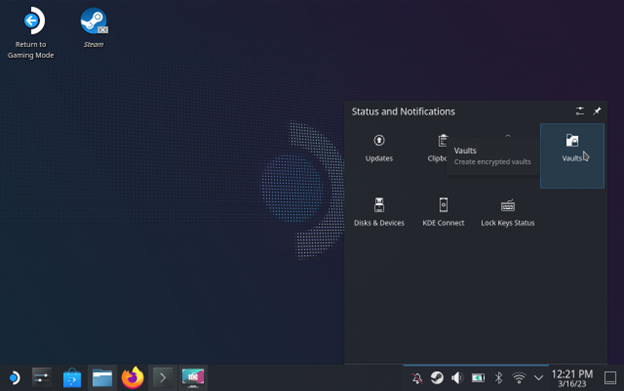
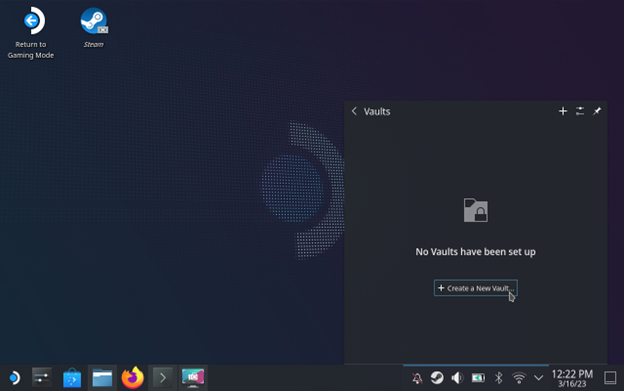
Now that we have an encryption backend installed, we can go ahead and create a vault to store some data in! You can find the Plasma Vaults settings tucked away under the status bar icon tray, as shown below.
After you click on this, you will be presented with a message stating that no vaults have been set up. Click the "Create New Vault" button, shown below, to begin configuring a new vault.
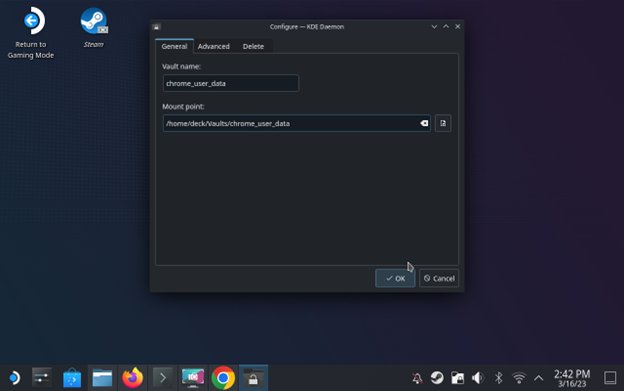
Give the vault a name; in this case, I've called mine chrome_user_data. You can leave the storage and mount points and the rest of the values in the setup wizard as their default values unless you want to change them.
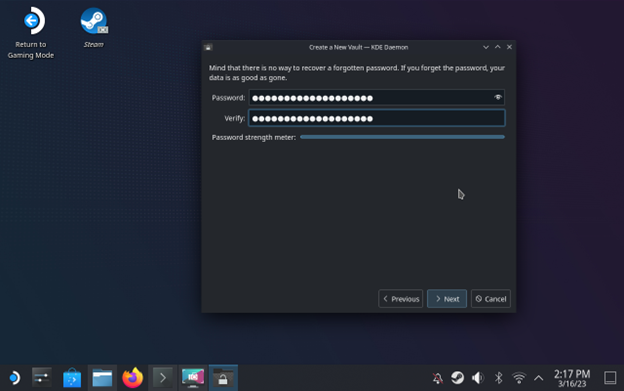
Make sure to set a strong password and to keep it stored somewhere safe such as in a password manager. If you lose this password then the data in your vault is as good as gone.
Once the vault is created, you will be able to see where it is mounted and stored on the filesystem. If you left the mount point as the default, then this will be under /home/deck/Vaults/<vault_name>. You can place any files you want stored in the encrypted vault into this folder.
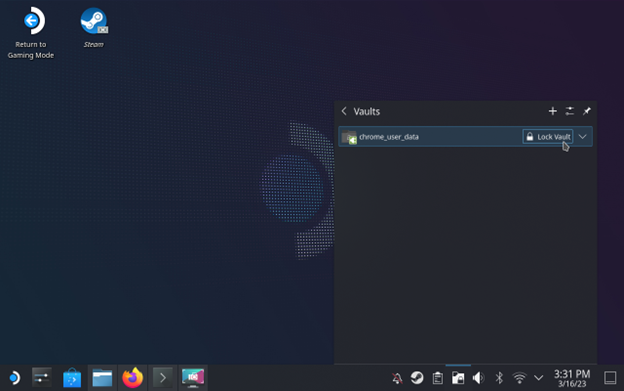
You can quickly lock and unlock the vault using the status bar icon, as shown below.
So, now that we have created an encrypted vault, it's time to encrypt some sensitive data that we might want to protect on our Steam Deck.
I'm going to encrypt my Google Chrome profile data. However, the general process for encrypting config data that is used by various applications is as follows:
- Identify the folder in which the configuration data is stored for a given application
- Copy the data into the Plasma Vault
- Delete the original data
- Create a symbolic link in place of the original folder to the folder in the Plasma Vault
This will allow the application to still find the data it needs so long as the vault is mounted and unlocked.
To do this for your Google Chrome profile data run the following commands.
    cp -a ~/.var/app/com.google.Chrome/config/google-chrome/ ~/Vaults/<vault_name>/
rm -rf ~/.var/app/com.google.Chrome/config/google-chrome/
ln -s ~/Vaults/<vault_name>/google-chrome ~/.var/app/com.google.Chrome/config/google-chrome
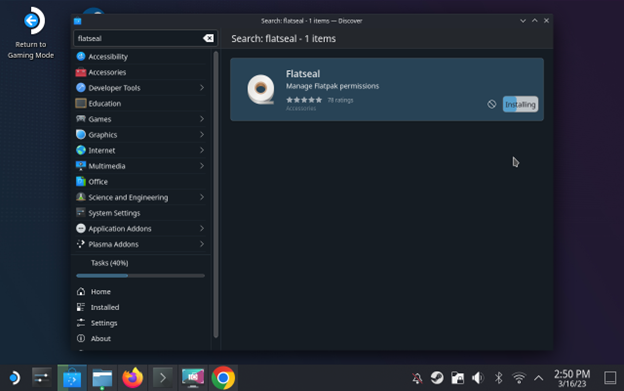
Now we need to go through and change the Flatpak permissions on our Chrome install to allow it to access the folder in our encrypted vault. To do this, we need to install Flatseal, which will allow us to easily modify the flatpak permissions of our applications. Flatseal can be installed via the software center, as shown below.
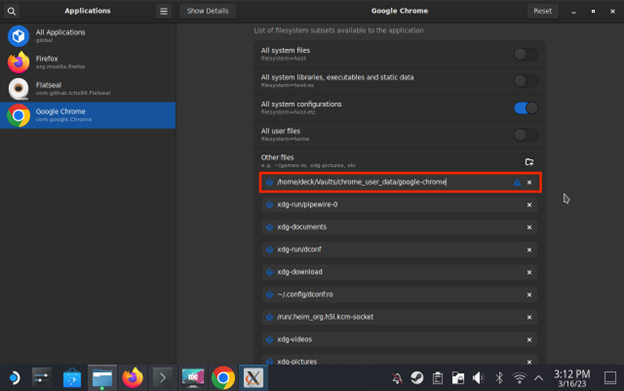
Once Flatseal is installed, simply launch it and select Google Chrome in the list of applications. From there, scroll down to the Other Files section and add the following /home/deck/Vaults/<vault_name>/google_chrome, as shown below.
And there we have it. In this case, your Google Chrome user data will be linked into the encrypted vault and encrypted when the vault is locked! Additionally, Chrome will not even startup unless the vault is unlocked.
If you want to see a collection of Steam Deck tricks and tips, you can check out the following Gitlab repository by Philipp Richter: https://gitlab.com/popsulfr/steam-deck-tricks#steam-deck-tips-and-tricks
For example, there is a section on configuring the ability to quickly decrypt your Plasma Vault from the Steam Deck UI!
Look out for more Steam Deck content as I take a deep dive into the security of the device in future posts! Next up, we will be looking at capturing and analyzing the Steam Deck's network traffic!
Portable devices, unencrypted data, exposed credentials. Sound like a pentest finding?
Endpoint security, device hardening, and data-at-rest encryption gaps are all things our team looks for during security assessments. If you want to know where your organization's exposure is, reach out.
Get in Touch