

When a client calls us to pentest a web application that is only available in Internet Explorer, I cringe. I don't know if it's flashbacks from the countless hours spent getting a website compatible with IE, or the trauma from bad UX growing up. Just mentioning the browser leaves a bad taste in my mouth.
There is a unique problem that occurs when pentesting an IE-based web application. You can't proxy only IE traffic. If you adjust the proxy rules for IE you have to route ALL of your system traffic through Burp. That includes chat clients, other browsers, Office products, background Windows processes, and anything else that is reaching out to the internet. Maybe you don't want your Burp history to fill up with requests to a music streaming site, or maybe you don't want your boss to know that you're "multitasking" with an extra Netflix tab. Obviously all of that traffic is out of scope and if you're familiar with us, you know that we fight tooth and nail against chatty apps.
Our solution here is to throw it all in a VM. This gives us a number of benefits, but being able to dispose of the OS is the key here. We don't want artifacts from our test lingering on our host machine. In this post we will go over setting up a Windows 10 VM for testing IE exclusive web apps. We'll walk through setting up the VM, installing the Burp certificate on the Windows guest and proxying the guest traffic through Burp.
VM Setup
First we need a Windows machine. We are going to use an evaluation copy of Windows to avoid the heavy price tag for licensing.
- If you haven't already, download and install VirtualBox.
- Download the evaluation copy from Microsoft's VM downloads page. Select the VirtualBox version of the OVA.
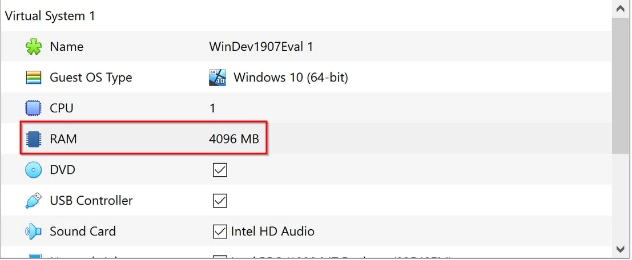
- Once downloaded we'll be changing a couple of settings after opening the file: set 4096 MB of RAM.
- Select Import.
- Under Settings > Network, switch the network to bridged adapter.
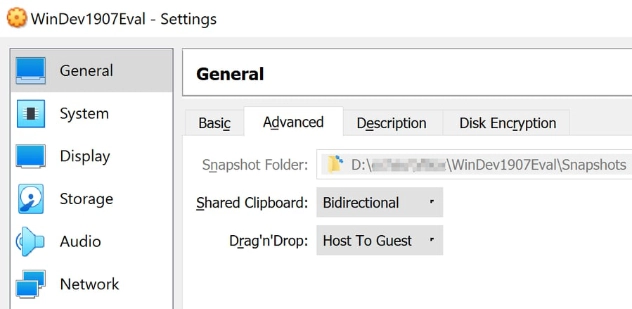
- Under Settings > General > Advanced, turn on Bidirectional clipboard sharing and Host to Guest drag 'n' drop sharing.
- Launch Burp Suite and set up a project for this engagement on your host machine.
- Go to http://burp with a browser that is configured with Burp to download the CA. If you haven't set up a Burp project in the browser before, here are the instructions.
- Boot the guest machine.
- Click and drag the cert.der file into your guest machine.
Installing the Burp Certificate
- Find the IP address of the network device that you are using to connect to the internet on your host machine. For Windows pull up ipconfig, and use ifconfig on Unix-based systems.
- In the guest machine use that IP address with :8080 to download the Burp Suite certificate.
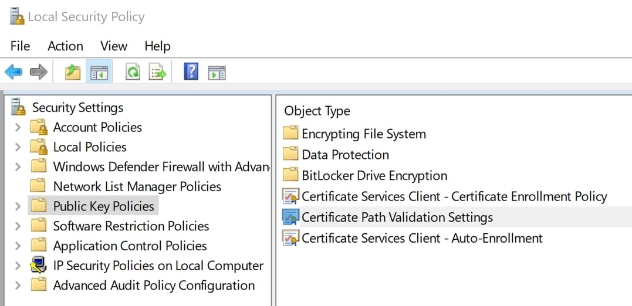
- Open the Local Security Policy by pressing Win + R and enter secpol.msc.
- Select Public Key Policies > Certificate Path Validation Settings to open a Certificate Path Validation Settings Properties window.
Select the Stores tab and select the Define these policy settings check box.- Select the Allow User Trusted Root CAs to be used to validate certificates and Allow Users to Trust Peer trust certificates options if they're not already selected.
- You should also select the Third-Party Root CAs and Enterprise Root CAs checkbox and press the Apply > OK buttons to confirm the selected settings.
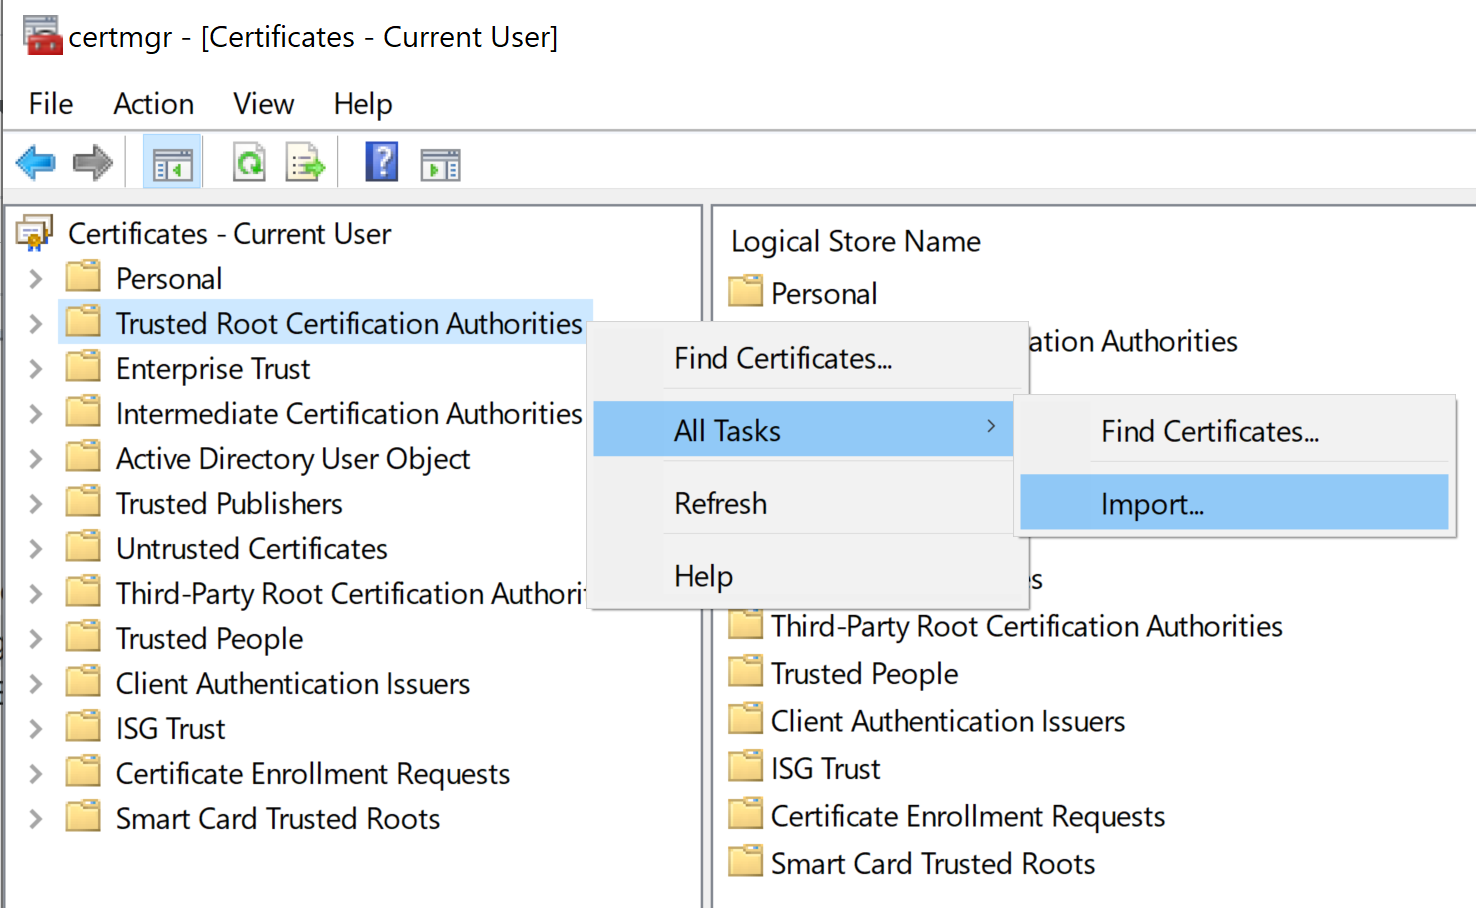
- Press Win + R and enter certmgr.msc.
- Right click Trusted Root Certification Authorities to open a context menu.
- Select All Tasks > Import on the context menu to open the following window.
- Press the Next button, click Browse, and then select the Burp root certificate file saved on your guest machine.
- Press Next again and place all certificates in the Trusted Root Certification Authority store.
- Then you can press Next > Finish to wrap up the import wizard.
- A popup window may come up asking if you trust PortSwigger as a Certificate Authority. Click Yes to allow it.
- A window will open confirming that "the import was successful."
Proxy Guest Traffic
Now you're ready to proxy traffic through the host Burp project.
- Open Internet Explorer and go to Tools > Internet Options > Connections tab.
- Open LAN settings.
- Check the Proxy server checkbox and enter the IP address found with ipconfig in the first step of Installing Burp with port 8080.
Just a bit of a warning: after a week or two this evaluation VM will expire. When this happens the VM will start shutting down every couple of hours. Once that happens, you'll have to throw it away and start over.
Need a penetration test for your web application?
Whether your app runs in IE, Chrome, or anything else, our team has the tools and experience to test it thoroughly. Reach out to discuss a security assessment.
Talk to Our Team