

This holiday season, I'm going to run down some of the ins and outs of working with OWASP Zed Attack Proxy (ZAP). I came at this having barely touched ZAP before, but having used Burp Suite as my daily driver for years as a penetration tester. This gives me a relatively fresh eye on ZAP, and I will focus on what's important to the developer trying to reproduce a reported flaw or the QA specialist trying to work some additional security into their game. For twelve days, I will have a daily topic, provide bite-sized tutorials, tips, and examples. But first, let me address an important duo of questions:
What is OWASP ZAP, and what can it do for me?
ZAP is an interception proxy, a tool that passes traffic in between an HTTP client application (e.g. browser, mobile app) and the server(s) it interacts with. The traffic it handles is similar to what you would see in the Network tab of your browser's built-in dev tools, but ZAP provides richer tooling for tampering with and replaying the traffic in ways that are useful for discovering and proving exploitability of flaws in applications and web services. It also has tools to help discover flaws, such as automated crawling and traffic analysis facilities.
OWASP Zed Attack Proxy is available at https://www.zaproxy.org/
An Important Note About Permission
One of the most prominent experts on physical security, known by the pseudonym Deviant Ollam, has written a book called Practical Lock Picking. This book has a section on Ethical Considerations prepended to the first chapter. In short, the rules concluded in that section are:
- Don't pick locks you do not own.
- Don't pick locks on which you rely.
The same approximate guidance applies to using ZAP to mess with applications. Sending malformed, modified, or manipulated traffic to a server is attacking the server. This can have unexpected and catastrophic consequences, and is a crime if done without permission from the individual(s) or organization(s) who own the application software and the infrastructure it's running on.
Being hired to develop an app doesn't grant you the permission to attack it either, so if you want to test an app you've been developing at work, be sure to follow any existing guidance, and to obtain buy-in and permission from the application and infrastructure owners. Choose a non-production environment, and make sure stakeholders are aware of when you're going to be testing.
The best option is to play around with ZAP on your own personal machine against a target application designed for security labs or learning. This fulfills Deviant's rules above:
- You own it, it's open source software running on your own machine.
- You don't rely on it, your instance of the app doesn't have real users, if you put it into a broken state it's no big deal.
My examples primarily use Wayfarer, which is available at https://github.com/samuraiwtf/wayfarer. Wayfarer is a vulnerable single-page app and API that was created for SamuraiWTF, the open-source Linux-based training lab that we use for many of our training classes. The OWASP Juice Shop app is another popular target app which has some simple options to run locally with Docker or Vagrant. It is available at: https://github.com/juice-shop/juice-shop.
Day 1: Proxying HTTP and HTTPS Traffic
The thing about an interception proxy is that it's kind of useless if you can't intercept the traffic. So Day 1's tutorial is a necessary step to address that. It's probably the least interesting topic of the series, but it's a crucial step.
The Easy Way
Step 1: Launch ZAP
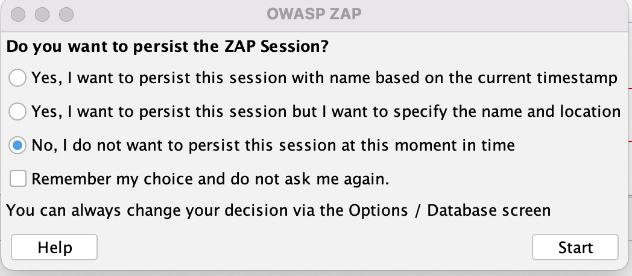
No surprise here, we have to launch the app if we're going to use the app. We're quickly met with the following dialog asking about persisting our session. Either of the persistence options should work if you want to be able to come back to the project, but since I'm just playing around, I'm going to choose No, I do not want to persist this session at this moment in time.
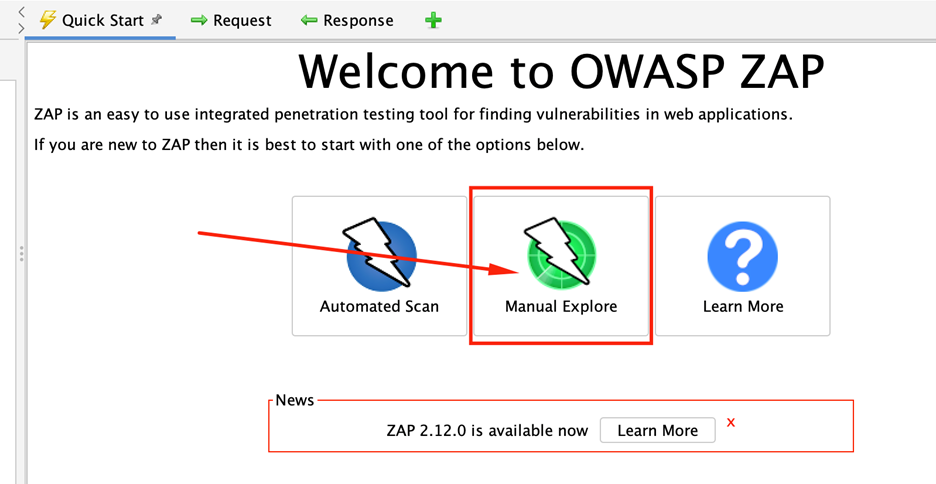
Step 2: Choose Manual Explore
In case you happen to be navigated away, this is in the middle of the Quick Start tab.
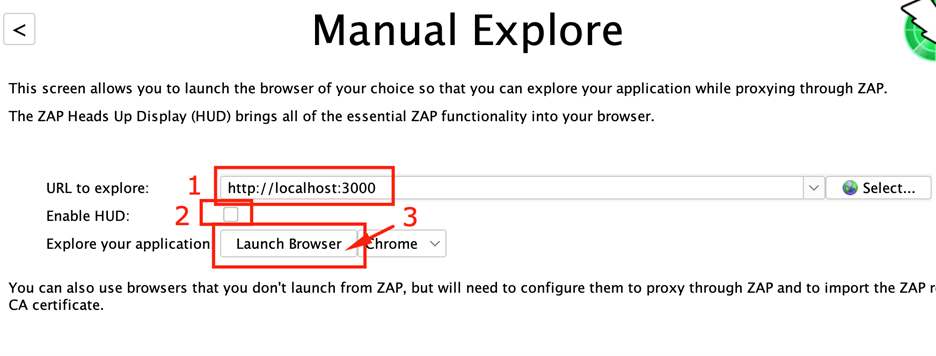
Step 3: Choose a target and launch your browser
Enter a URL to explore, in my picture I have localhost:3000 for a local app I'm testing. Obviously you would use the URL for your target application.
Enable HUD should be unchecked for now. We'll look at that piece in a few days, but for now we'll look without it.
Choose a browser on your system, and launch it with the Launch Browser button. If this doesn't work for you, check out the Manual Setup method below.
Step 4: Navigate around the app
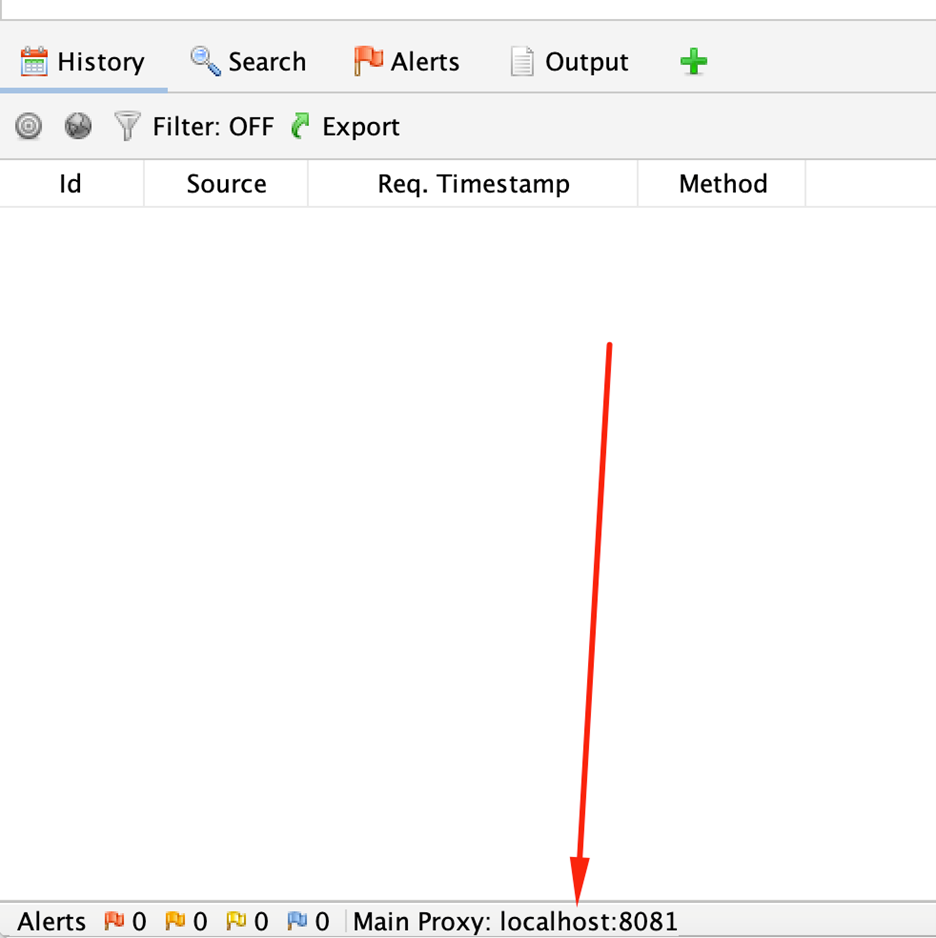
As you browse, you'll see the History pane at the bottom being populated with your traffic. You might recognize this as the same sort of data you get in the Network tab of your browser's dev tools. You can expect to also see some noise from the browser interacting with services such as googleapis.com.
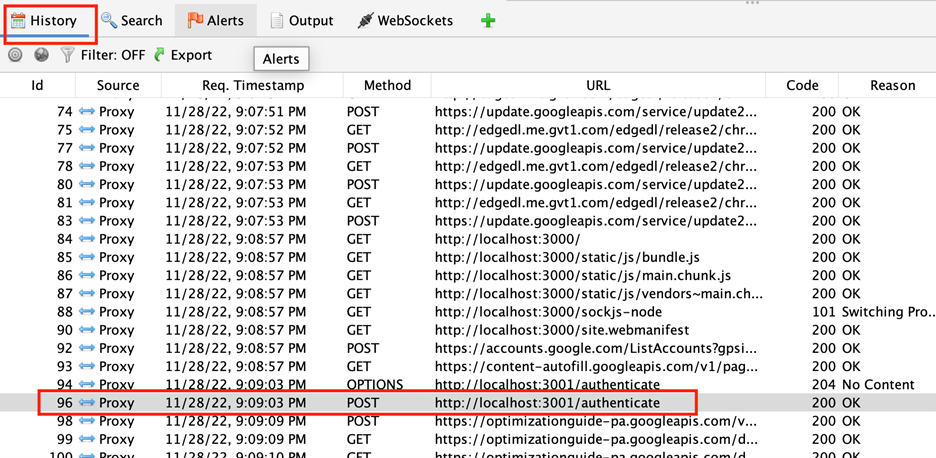
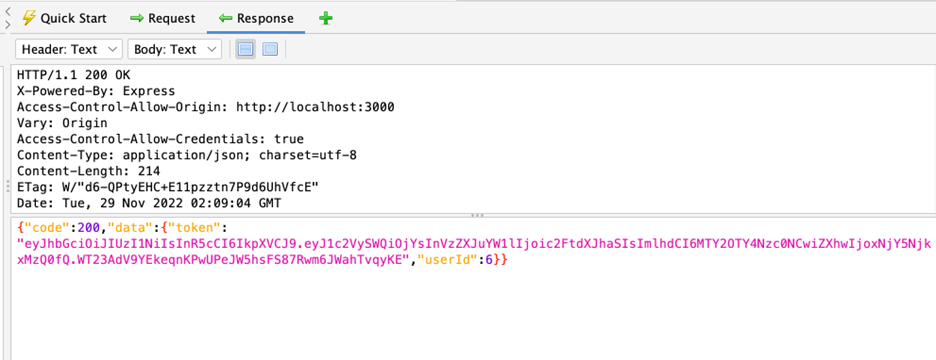
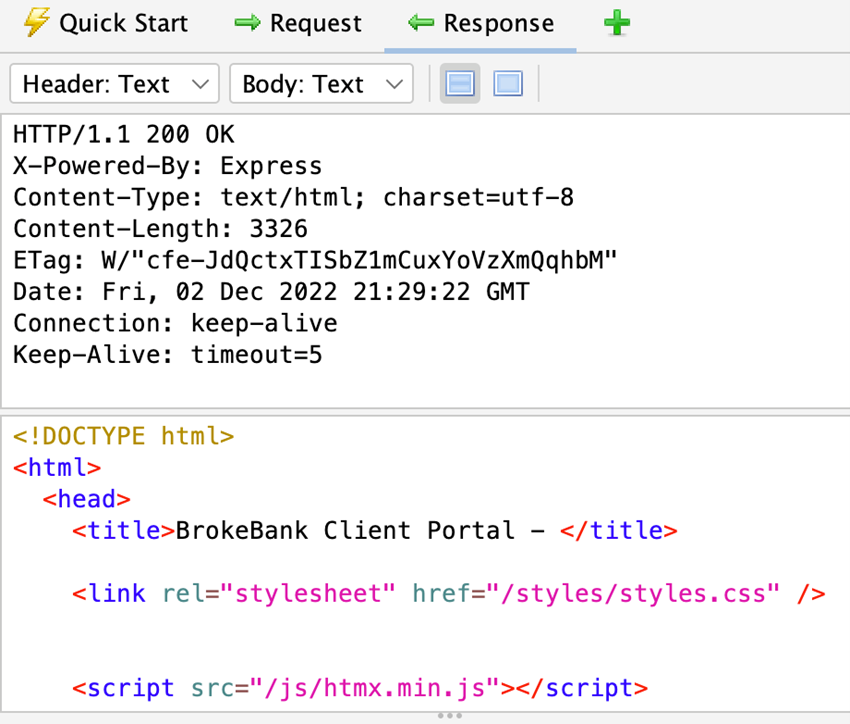
Step 5: Take a closer look
If you select a request from the History tab, the main pane will show the Request and Response in those respective tabs.
Manual Setup
There are a few reasons the Easy Way might not work for you. Maybe you want to use a browser that ZAP didn't detect or won't launch, for example some of my browsers generated the pop-up below.

It's not terribly difficult to manually setup a browser to proxy, but there is a caveat: ZAP won't be able to setup the certificate trust, so you will need to do that yourself or else you will get TLS certificate errors for HTTPS traffic.
Step 1: Launch ZAP
Again, the persistence option doesn't matter.
Note what port your proxy is listening on. Mine was on 8081, indicated by the text in the footer of the window.
Step 2: Open your browser
I'm going to narrow the focus here to Chrome and Firefox. If for some reason you have to use Safari, IE, or a non-Chromium version of Edge, setting the proxy will be a little more difficult, so we'll skip them at least for the moment.
FoxyProxy Standard is a free extension available for both Chrome and Firefox in their respective extension stores. I recommend it, as it makes it easy to toggle the proxy on and off, and even limit its scope to certain URLs. I'm going to use it in the setup process here.
FoxyProxy Standard for Chrome: Chrome Web Store
Note: Chrome doesn't respect the proxy setting for apps on localhost. This can be solved by adding an entry to your hosts file.
FoxyProxy Standard for Firefox: Firefox Add-ons
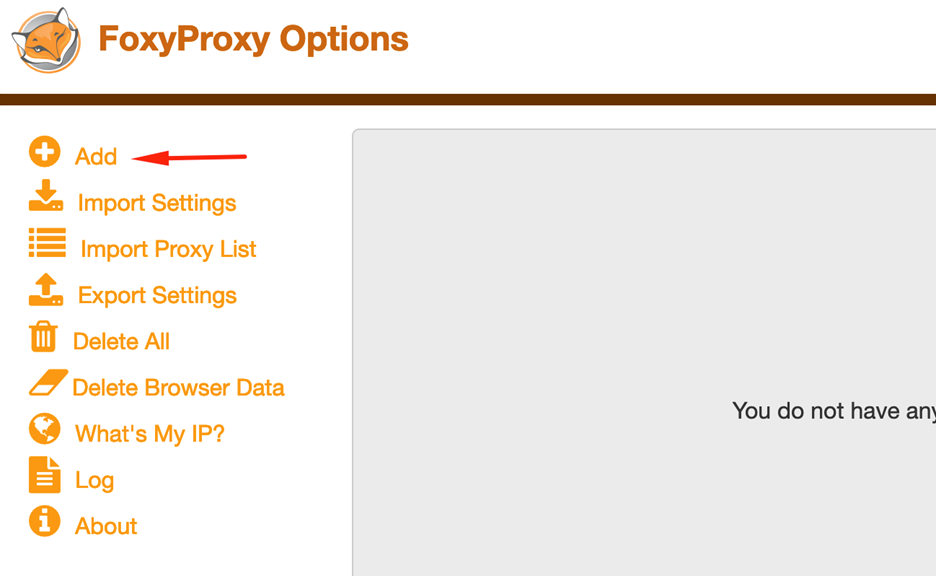
Step 3: Configure your proxy
In your browser, open the options for the FoxyProxy extension.
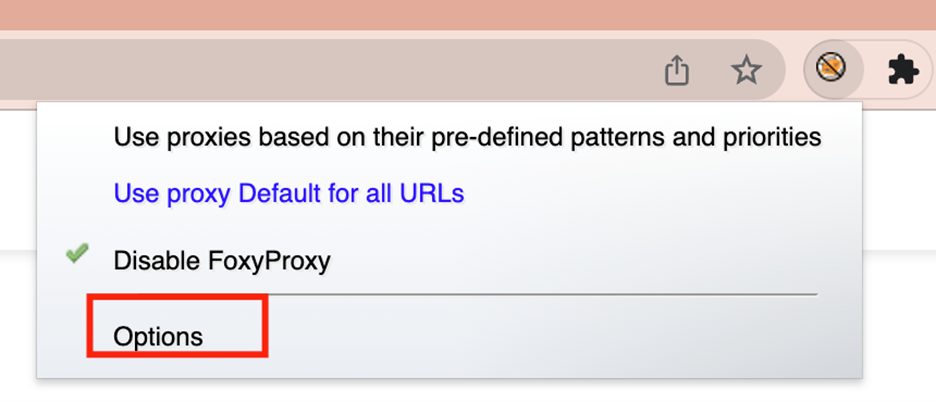
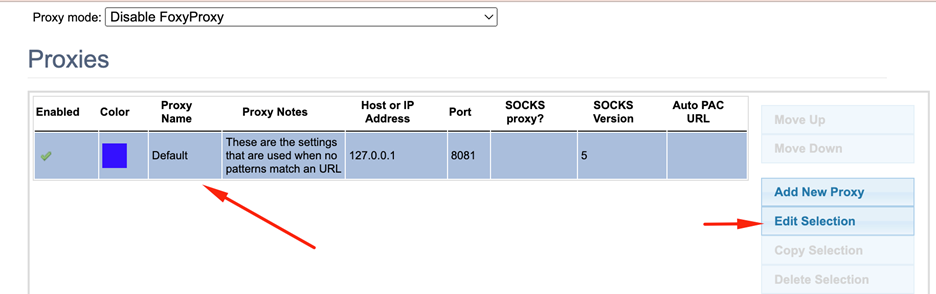
The next part looks a little different depending on whether you have the Chrome version or the Firefox version, but the principle is the same. You want to add a proxy configuration or select and edit the default one if there is one.
Chrome:
Firefox:
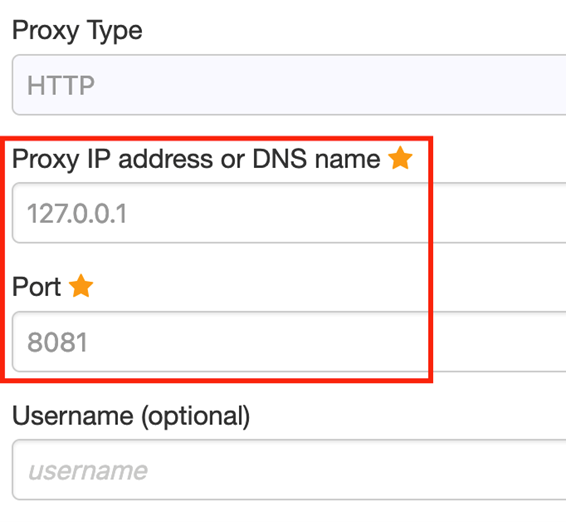
Set your proxy Host or IP to 127.0.0.1, with the Port set to whatever port ZAP is listening on (from Step 1). Mine was 8081, yours could be 8080 or something different.
Chrome:
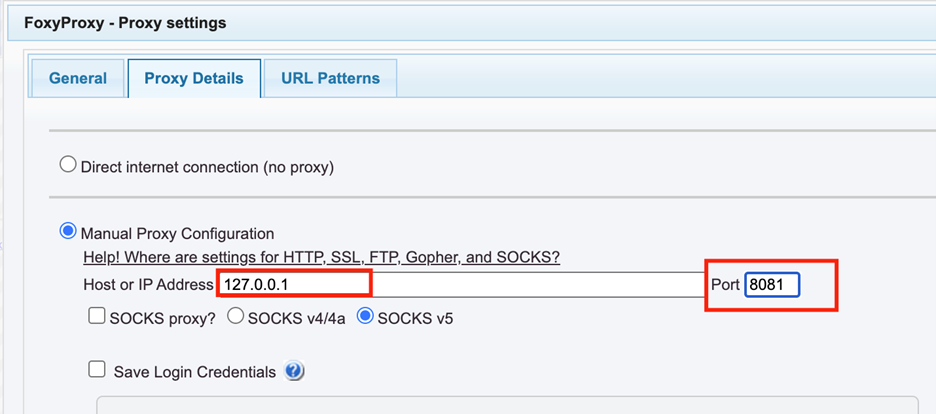
Firefox:
Save your configuration and close the FoxyProxy settings.
Then click the extension icon in the browser toolbar and select the proxy you created.
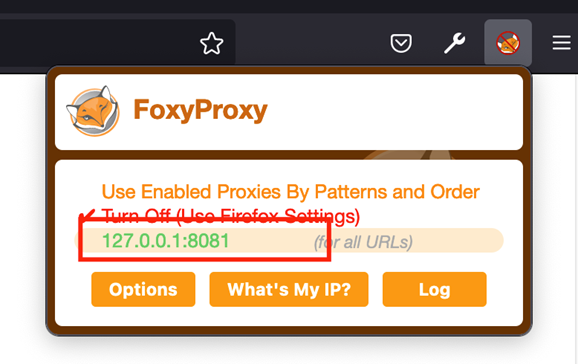
The icon will change to indicate your proxy is selected:  or
or 
Now you should be able to browse to anything available over HTTP, and see the traffic collected in the History tab of ZAP. But if you go to a TLS protected site (i.e. most sites today), the browser will complain, as shown here:
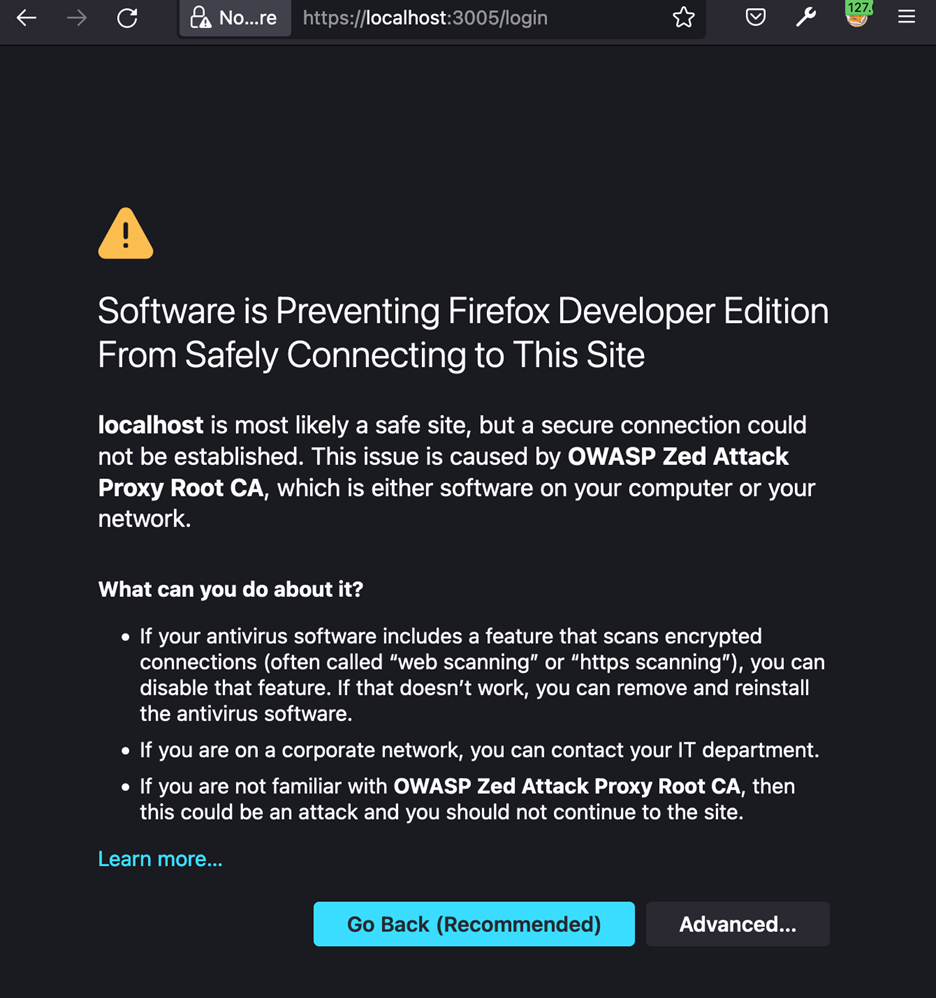
Step 4: Add the CA Certificate Trust
The background on this step is that, in order to inspect the TLS encrypted traffic, ZAP is essentially taking one connection (Browser > Server) and separating it into two separate TLS connections (Browser > ZAP > Server). As a result, when ZAP passes a response to your browser, it's having to re-encrypt it with its own CA cert. This is also a generated certificate that's unique to your installation of ZAP, so you are trusting your own CA Cert that only you have. My instance of ZAP will generate a different cert that is uniquely mine. With that in mind...
First navigate the browser that's proxying to http://zap, this will open a special webpage served by the proxy itself, so that you can easily download your CA certificate (.cer file).

Next, open the certificate management interface in the browser's settings.
Manage Device Certificates in Chrome:
Open settings.

Use the search bar to search for cert, which will highlight the Security section of the settings. Open that.
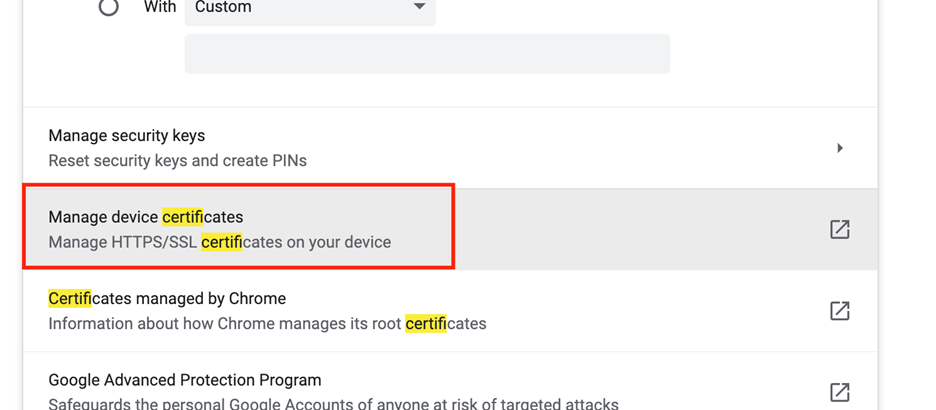
Scroll down to Manage device certificates (it's near the bottom of the Security settings) and select it.

What this does will vary depending on your operating system. On many mainstream Linux distros, it will bring up a certificate management interface within the browser. On Windows, it will open the system certificate manager.
Whichever app it is, the goal is to import your .cer file as a certificate authority. In Keychain, it's under the File menu, Import Items. You will see the OWASP Zed Attack Proxy Root CA in the list once it's successful.
If you notice the red X icon on it, that certificate is not yet trusted. Windows and Linux work the same, in that trusting the cert is an additional step.
In Keychain, I double-click it and it pops up a dialog, and I can set it to Always Trust for SSL.
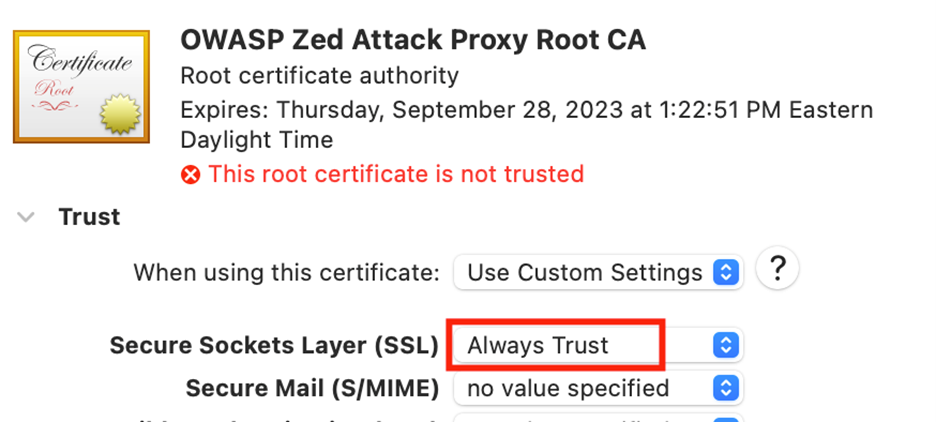
When I close the dialog, I get prompted for the elevated permissions to make the change, and then it shows as trusted.

Certificate Manager in Firefox:
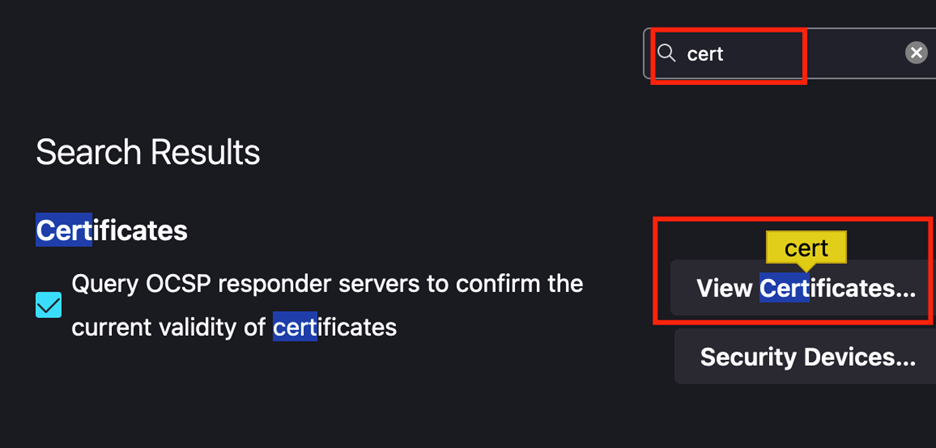
Open the menu and go to Settings.
Search for cert and select View Certificates... from the Certificates result.
This brings up Firefox's built-in Certificate Manager, which has an Import button. Click that.
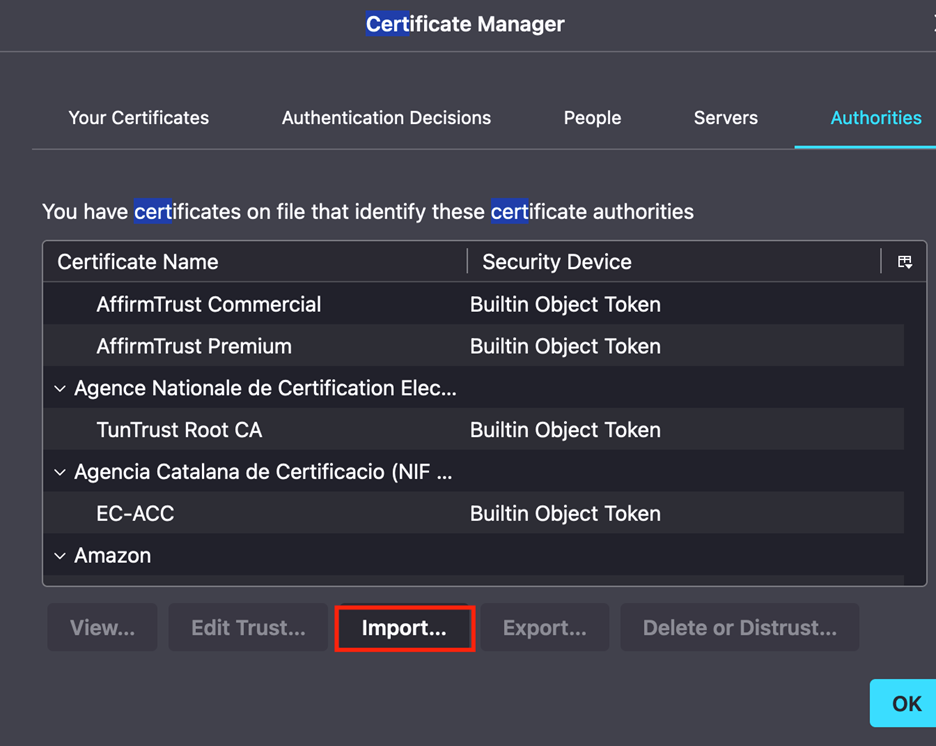
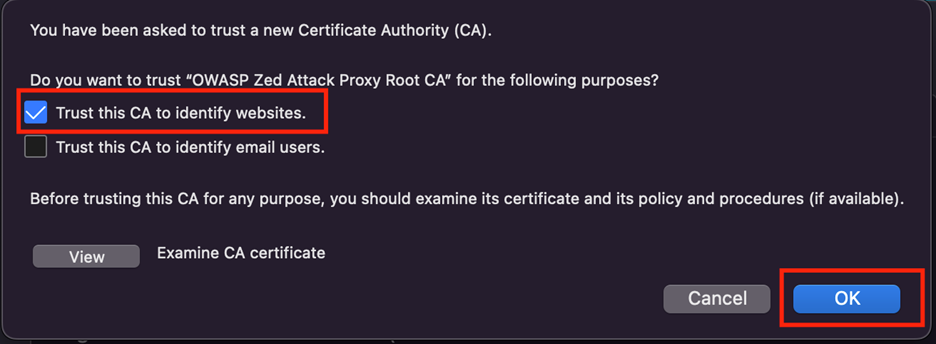
Using the file dialog, select your .cer to import. This opens a new dialog to set the trust.
Once that's done, I can find an entry in the list under OWASP Root CA.

Step 5: Verify that it's working
Browse to an HTTPS site to capture some traffic, to validate that it's working. You should see traffic populated in the History pane, and you can select entries to view the request and response.
In Summary
Just about everything you would manually do within ZAP is dependent on getting requests into the application, and this is the primary way of doing it. While it's not very interesting on its own, it's a building block.
Rather have a professional test your app?
Proxy setup is just the first step. Our web application penetration testers go far beyond what automated tools catch, testing business logic, authentication flows, and API security. If your application needs a thorough assessment, we can help.
Get in Touch