
In my previous article, we covered identification and mapping of the UART interface. In that article, we covered the following:
- Identify possible UART interfaces on PCBs
- Use a multimeter to map out the pins
Armed with that knowledge, you should be able to find possible easy-to-discover UART interfaces on a PCB and map out the pins with a multimeter. However, we didn't cover how to actually talk to the UART interface. I decided to push that into this article so we can discuss the hardware and software that will allow you to connect to a UART interface. The goal of today's blog post will be:
- Discuss settings used for serial connections
- Discuss hardware needed to connect your computer to the UART interface
- Cover an easy method for determining the baud rate
- Cover various software options for connecting to serial
UART Settings Explained
To begin with, the software tool PuTTY, which is typically used for SSH, also supports serial communication. This tool has a settings screen for configuring the serial communication as shown in the screenshot below.
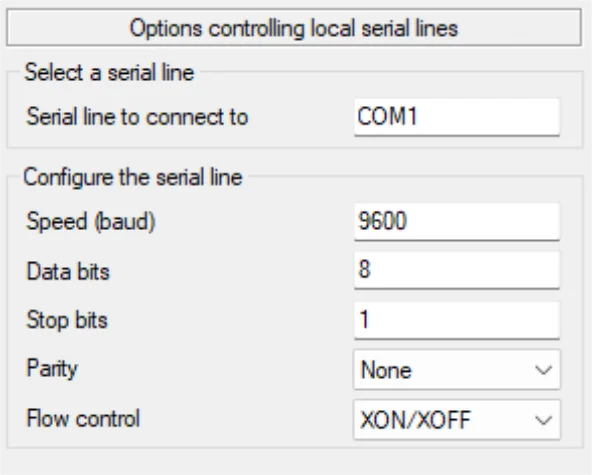
The primary settings we want to ensure we understand are:
- Baud Rate: The speed of the communication
- Data Bits: The data being transmitted
- Stop Bits: The stop bit information
- Parity Bits: Optional parity for the data sent
The configuration shown in the screenshot above is often called 8N1 (8 data bits, No parity, 1 stop bit).
About Baud Rates
The UART interface is pretty minimal and most is just a send and receive set of data lines. In digital communications, bits are either one or zero depending on whether or not they cross a logic voltage threshold at a given sample point in time (note: this is an overly-simplified explanation and ignoring modulation schemes). The big takeaway here is that the sampling is time-driven. The faster that sampling happens, the faster the data transfer.
However, UART only having two data lines is nice for simplicity's sake, but it's missing a clock signal (CLK) line. This usually allows devices to dictate their own speeds. Without that, then we need some other system to synchronize the speed of the communication.
Enter the baud rate. The baud rate is used to measure the number of bits per second that can be transmitted. In essence this can serve as a clock, so long as both sides are configured with the same baud rate. With that said, if the baud rate is out of sync on either side, you will likely just see non-printable gibberish.
If you think you found a UART pin, it might be worth exploring it. However, we will need a combination of hardware and software to interface it with our computer.
Hardware
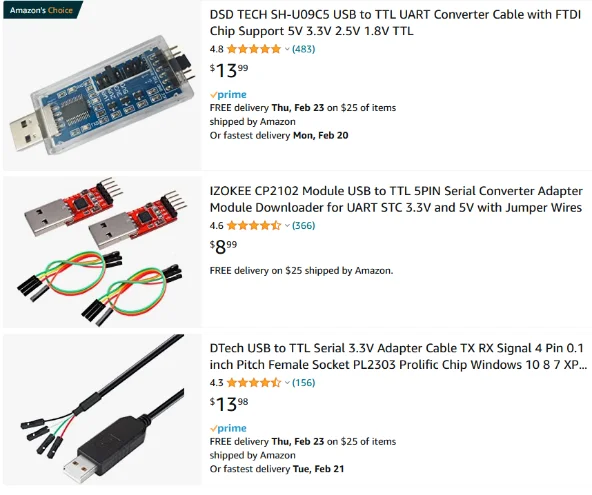
From the hardware standpoint, we will need some sort of adapter to connect our computer to the PCB's UART interface. The simplest tool for that is the USB to UART adapter. These are dirt cheap on AliExpress, usually less than $5 shipped, if turnaround time isn't an issue.

Amazon is a little faster on turnaround, but usually slightly more expensive.
Personally, I've had a lot of success with my little USB to UART adapter I got off of AliExpress.
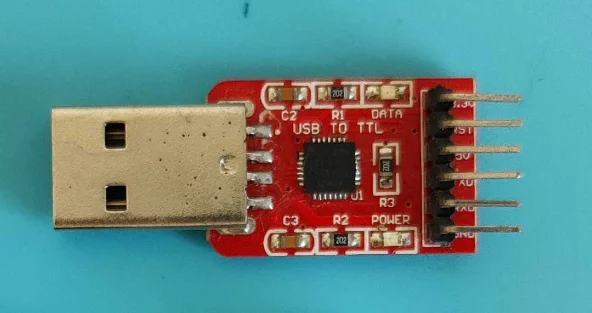
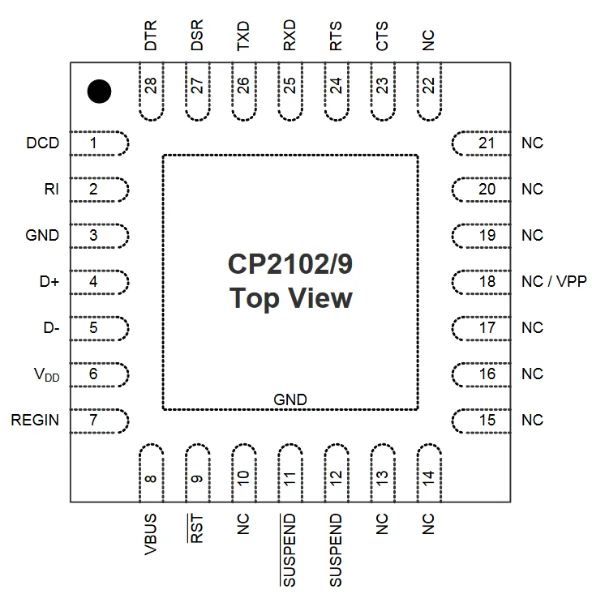
That USB to UART adapter was built off of the Silicon Labs CP2102 chip as shown in the screenshot below.
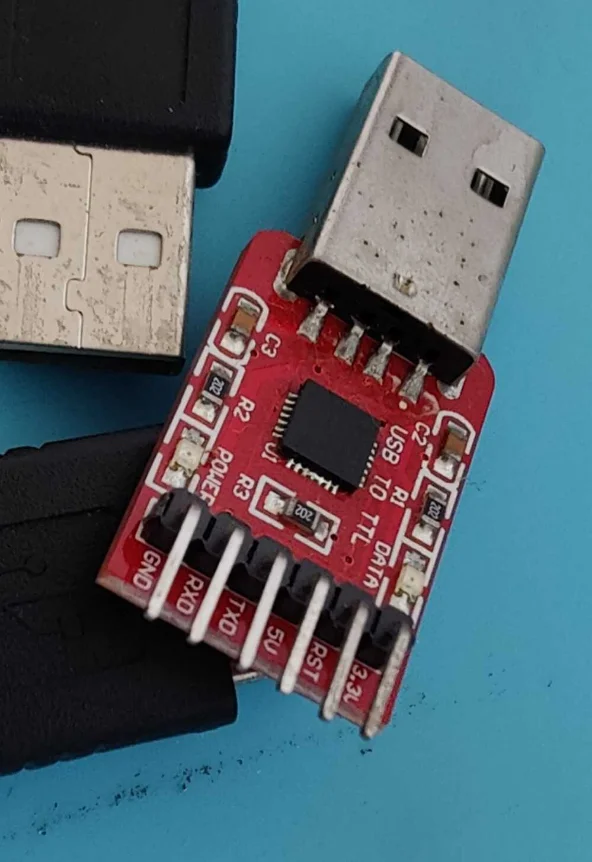
There are labels for the pins under the pin headers at the edge of the USB to UART board. The photograph below shows these labels.
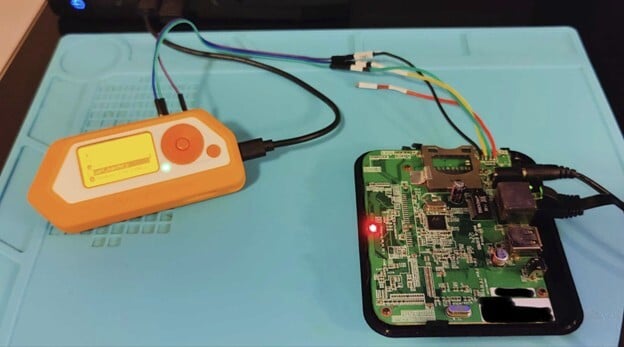
Another option is the Flipper Zero. This device supports operating as a USB-to-UART adapter with the factory firmware. If you have one, just go GPIO > USB-UART Bridge and plug it into the computer via USB. In my testing, this appears as /dev/ttyAMC0.
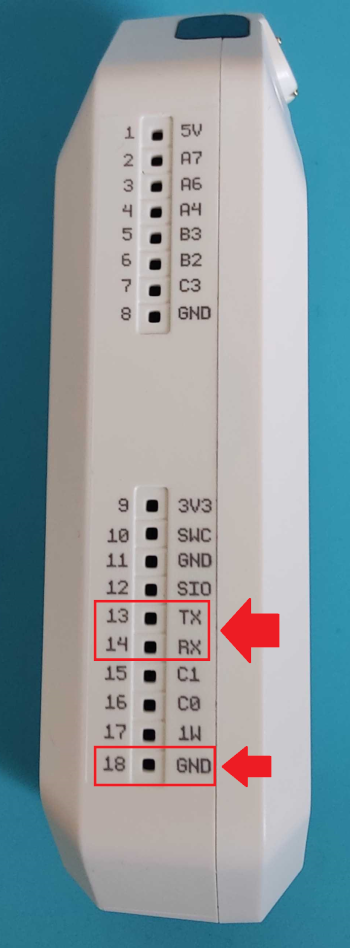
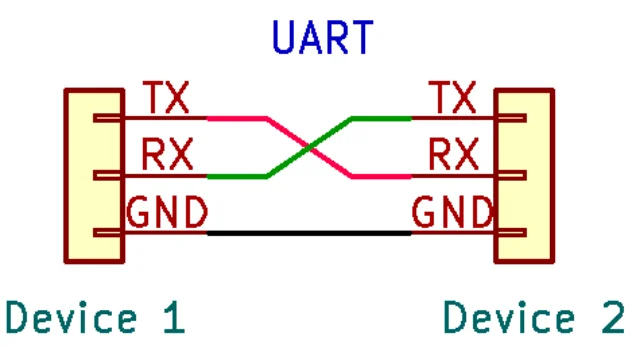
Having known the pin layout, we would want to connect the GND, TX, and RX pins via jumper wires. Don't forget to cross the RX and TX pins! Once the headers are connected to the target device, connect the USB device to our computer.
Software
With the hardware connected, we will want to use software to interface with it. For connecting to the serial port, there are a few choices. My personal two choices are:
- Screen: Command line option
- PuTTY: GUI option
However, before connecting, we need to determine the baud rate the device is using. For that I recommend a Python script called Baudrate.py.
Baudrate.py
The first tool I would recommend is SickCode's Baudrate.py script. This script is used to connect to the serial device and allow you to cycle through common baud rates. This is the simplest way to discover the correct baud rate, which you'll need to know to configure your serial connection.
Basically the idea is to run this script, power cycle the device so it starts spitting out the boot sequence text, and step through various baud rates till you see readable text. Record the actual baud rate and you can connect to the serial port properly.
Got a Flipper Zero? Take UART testing further.
Once you've found the interface and nailed down the baud rate, you can automate UART command injection using the Flipper Zero's JavaScript engine.
Read: Automating UART Command Injection with the Flipper ZeroScreen
Screen is the command line tool you might already use for background sessions, but it can also be used as a serial client. This is great for quick and dirty connections. The basic syntax is as follows:
screen [device] [baud]
The baud rate is optional, but if it's not provided, the screen command will default to 9600. Below is an example of a command to connect the screen command to our USB to UART (listed as /dev/ttyUSB0) with the baud rate 115200.
screen /dev/ttyUSB0 115200
PuTTY
PuTTY is a GUI application that is commonly used for SSH, but it also supports serial as well. All you need to do is select the Serial radio button on the main screen as shown in the screenshot below.
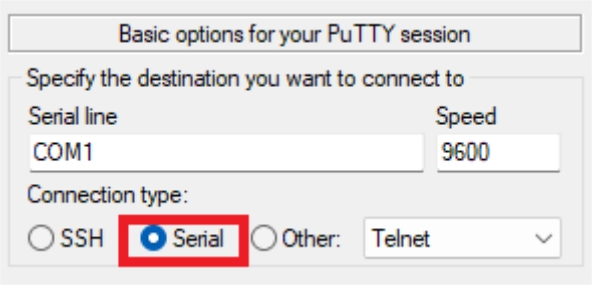
One thing that is nice about using PuTTY for serial communication is that these connections can be saved in the Stored Session list, so no need to remember the baud rate or settings. Just configure the settings in PuTTY, give it a name, and click save. Next time, you'd only have to click the name and click load then connect to get back into the device!
Conclusion
I hope you enjoyed today's article on connecting to the UART interface. What happens next once you are connected will vary from device to device. Either way, I hope you learned something and happy hunting!
Wondering what an attacker could do with your device's UART interface?
Our hardware security team tests embedded devices at the board level, from UART and JTAG to full firmware extraction. If you build or ship connected hardware, we can help you find what's exposed.
Contact Us