

Spidering is an automated process that recursively finds and follows all the navigation from an entry point, in such a way that all linked resources should be identified. I rarely use it in penetration testing engagements because I conduct the mapping manually. Burp Suite also shows linked resources that I haven't navigated to in its site map, so I still get the benefit of knowing what I haven't seen yet, and having the tool help ensure that I get full coverage. However, if you're using ZAP as more of an automated tool to automatically detect flaws, you're likely to make use of its spidering capabilities.
Tool-based Exclusions
Scope is a big deal when testing an application, that's why I put a big warning about it at the start of this series. Most notably, if you accidentally wander out of scope, you're likely to attack something you don't have permission to attack. That's not something to take lightly, since having permission is the defining characteristic for whether hacking an app is a criminal activity or not. You should definitely ensure that you've correctly defined what is in scope within ZAP, following the guidance I went over on Day 5.
But you may also want to exclude in-scope paths from certain tools. For example, if you know you have a large subsection of your site that's entirely static, non-interactive content, you may decide that it's not worth the time it would take to spider it. To create an exclusion rule for the Spider specifically, you can go to the Sites pane on the left side of the main window, or the History tab which we've already used. For my example, I'm going to use the Sites pane. As you might anticipate at this point, I'm going to start by right-clicking the target domain to open the context menu.
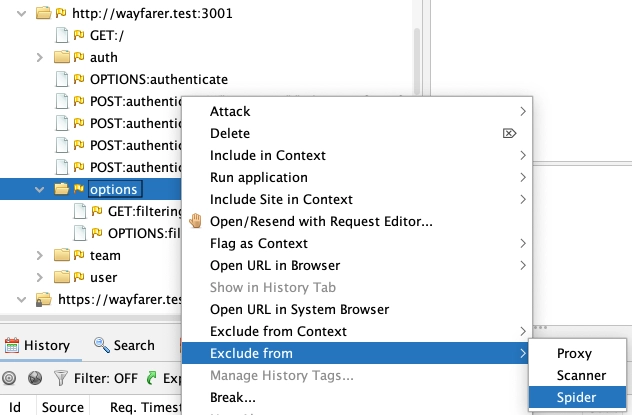
I chose a particular subpath of my wayfarer.test:3001 domain (the API server for the Wayfarer test app). I navigated to the Exclude from submenu, and I'm going to pick Spider.
-3.webp)
That's it. It's a straightforward and simple process, but it's good to know the option is available.
Handling Authentication
Caveats
ZAP's handling of authentication is problematic, especially if it's not straightforward form-based cookie auth. For handling complex flows (and a number of other tasks), ZAP has powerful scripting capabilities, but it's a challenge to find the correct details in the documentation for even simple tasks. If you need to use Bearer tokens or OAuth flows or anything like that, you will be better off obtaining the auth token and just configuring ZAP to inject it into the requests. In the upcoming day on scanning, I'll show a workaround that accomplishes just that. If you need to use scripting, check out the Zest Scripting video and its sequel by ZAP Project Founder/Lead Simon Bennetts. For cases where you just need to make a request and receive a cookie, it should work as indicated below.
Setting Up Authentication in the Context
If you anticipate needing to have the Spider enter an authenticated context, you will obviously need credentials for it. You will also want to determine how the application behaves when you have valid authentication versus when you do not. You can login, and then tamper with a request to remove the valid auth in order to compare. I used the Juice Shop app for this, and saw that when I requested an authenticated route with the Bearer token removed, I got the following.
-3.webp)
This shows the case of a missing token, but what if the token was simply expired? If I had wanted to take the time, I could have waited for it to expire (it was a JWT, so the exp claim was almost certainly there and could be examined). In my case, I made an educated guess that the status property of 401 would be the same, even if the message and code were different. For comparison, the same request with a valid Bearer token returned a status property of the string success.

I made note of this. Then I used the History pane to locate a request where I had logged into the application. I right-clicked it to open the context menu, went to the Flag as Context submenu, and found the entry for http://muddybank.test : JSON-based Auth Login Request. (For a form-urlencoded POST, there's the Form-based option as well.)
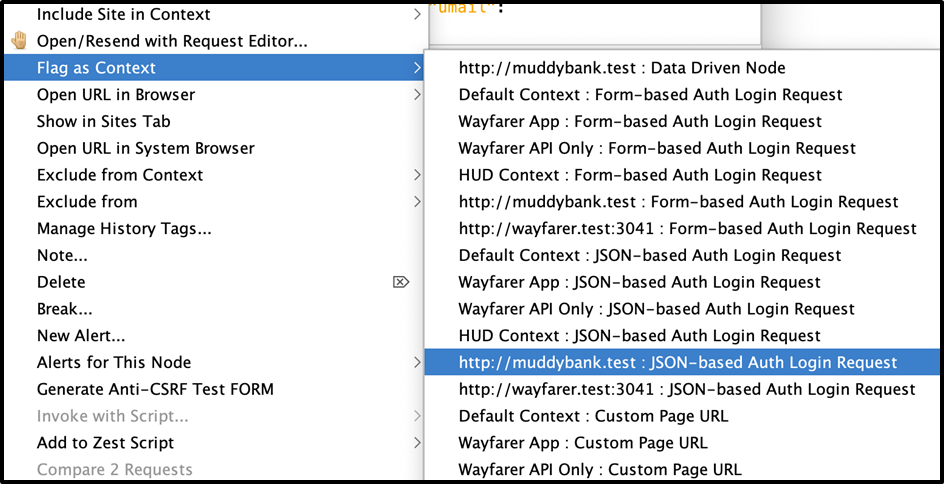
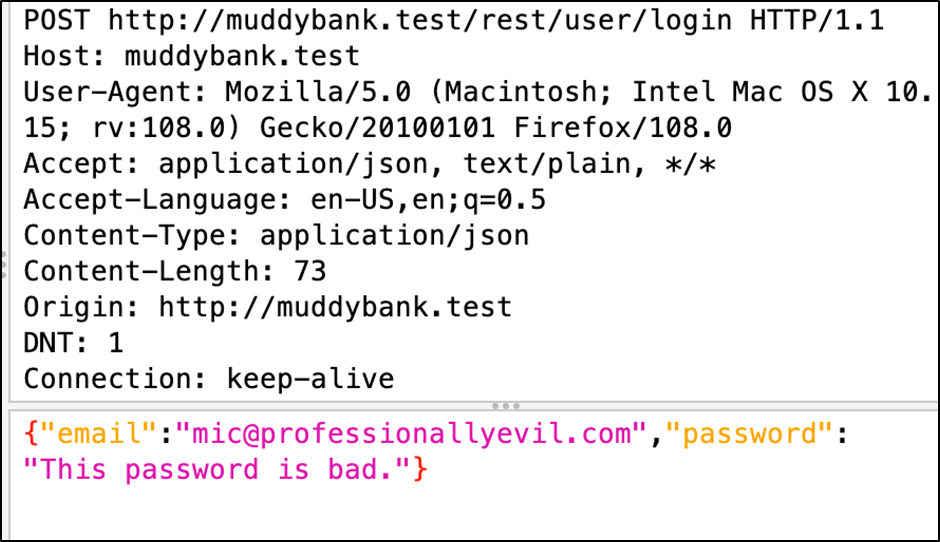
I chose this particular request because http://muddybank.test was the name of my scope for Juice Shop, and the authentication request submitted the credentials as a JSON payload, as shown below.
This opened the Session Properties dialog, having automatically navigated to the Authentication options for the context. It prepopulated some of the fields, but I had to rework it a bit. First of all, I made the Login Request POST Data field fit my parameters better, as both Parameter selects defaulted to email.
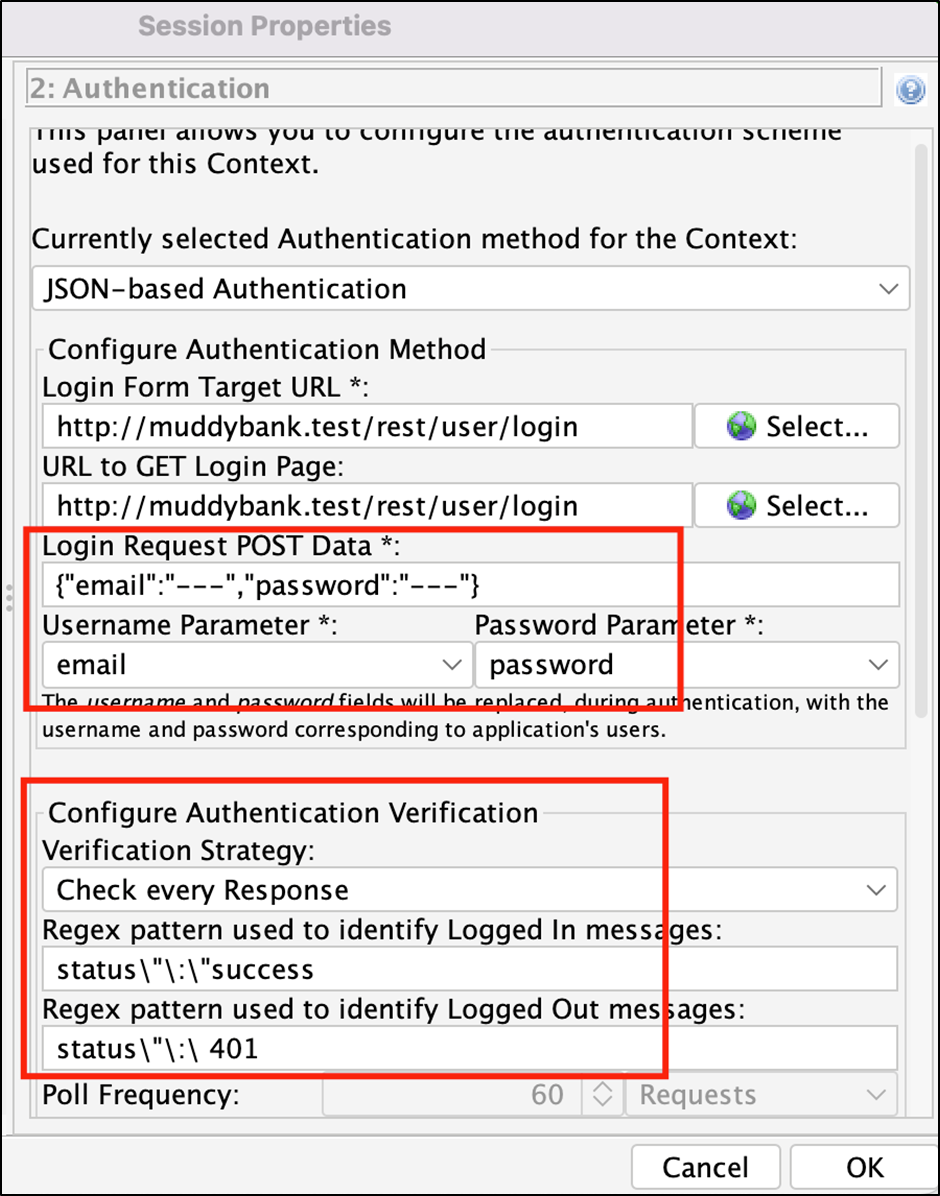
Second, based on my previous research, I added the Regex patterns to help ZAP determine whether I was logged in or logged out.
The last step in setting up the authentication was to navigate to the Users option on the Session Properties dialog using the menu tree on the left.
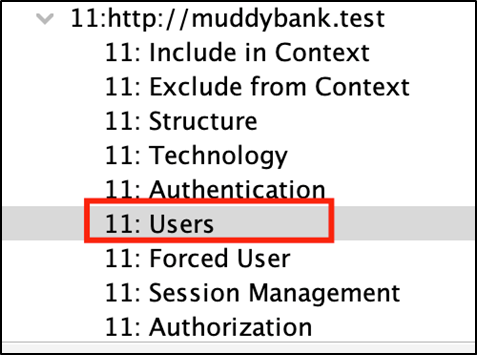
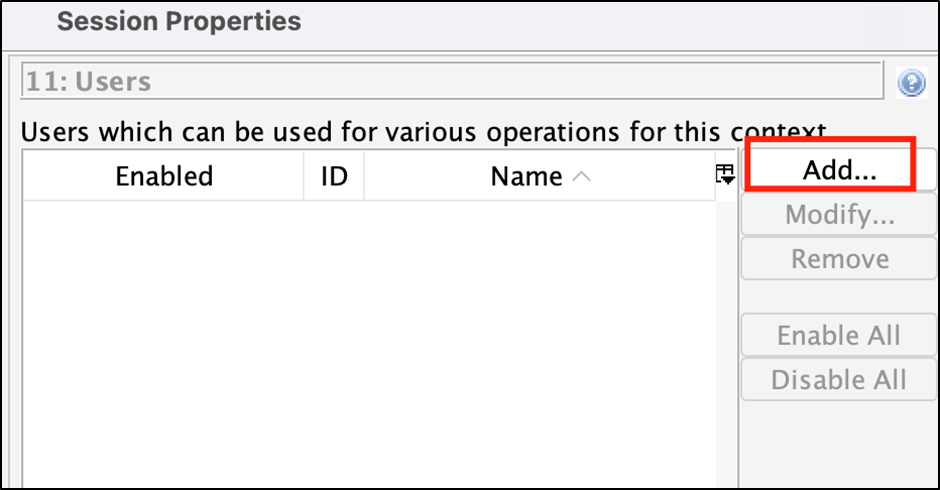
From here I was able to add my user...
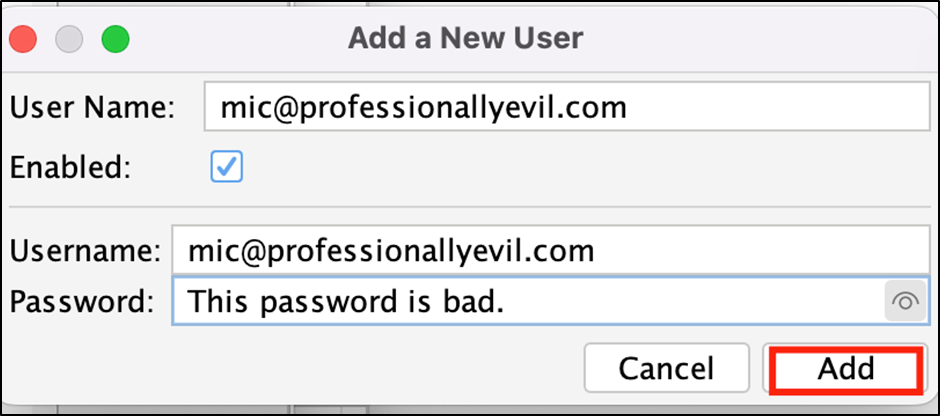
And input the credentials.
That should have me set up for authenticated spidering.
Running the Spider
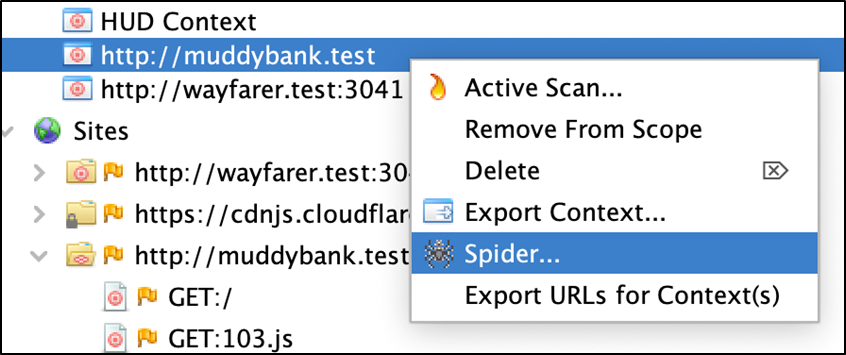
I right-clicked the context I had created for this application, and selected Spider from the context menu.
This opened the dialog pictured below. I made sure the Context and User were set, and ran the spidering operation with the Start Scan button.
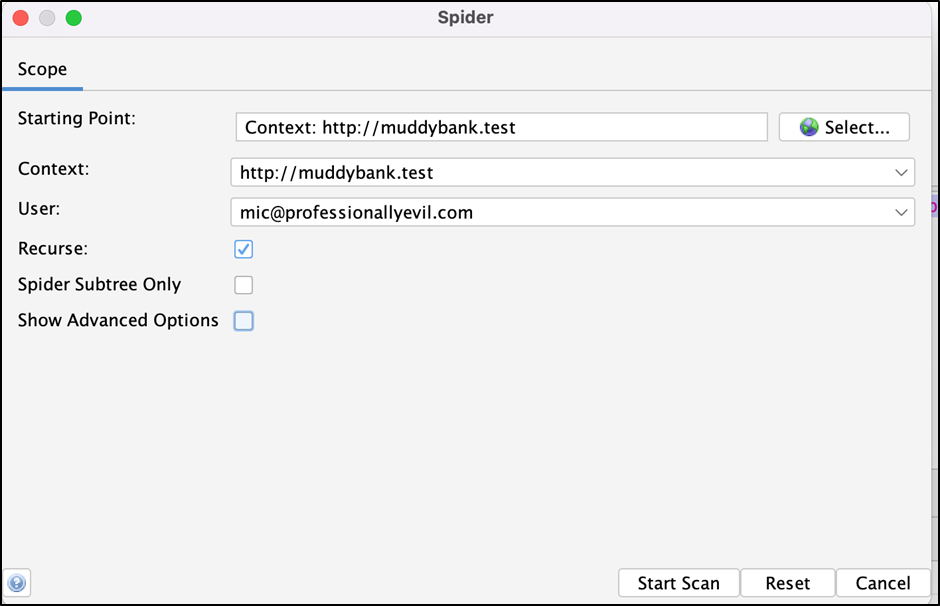
This opened the Spider tab in the bottom pane of the main ZAP window, and populated it with a bunch of new URLs it had found.

That's Spidering. In this case, I saw several resources added to the Alerts tab as well, but generally these were Alerts ZAP had previously discovered from my manual mapping.
In Summary
This was a quick way to discover a lot of the application surface. I would generally prefer doing it manually, as I said in the beginning, but Spidering is a good setup for using other automated tools, like ZAP's Automated Scanner.
Want professionals mapping and testing your application?
Automated spidering is just the start. Our penetration testers manually map applications, test authentication flows, and dig into business logic flaws that automated tools miss. Reach out to discuss a security assessment.
Talk to Our Team